新接手了一个后台CMS项目,项目的技术栈是React,内容的展示方式是多页签的方式,也就是存在多个模块共存的情况。
在熟悉项目代码的时候,发现项目的原始开发者居然利用这个条件,让多个模块共用某一个模块的样式,这样无序的样式使用方法,很容易造成一些问题。比如:样式覆盖、样式丢失等。
所以我决定引入css module来解决模块间样式相互依赖的问题。
相关技术栈
项目是使用 react-app-rewired 搭建的,具体使用方法参考 参考链接[1]. 项目使用的css预处理器是 stylus。
代码改造
为了更加突出重点,也为了保护项目隐私,所以后面只会展示部分相关的原始代码。
由于项目是使用 react-app-rewired 搭建的,使用 react-app-rewired 的用处在于可以在不弹出脚手架默认webpack配置的情况下,对默认 webpack 配置内容进行覆盖和改写。
原始 config-overrides.js 文件的代码是这样的:
config-overrides.js
// @Description: 结合react-app-rewired个性化处理CRA中的webpack配置(因为CRA中关于webpack的处理封装到了react-script中,不想做eject处理)
/* eslint-disable */
const path = require('path');
const {
    override, fixBabelImports, addLessLoader,
    disableEsLint, addWebpackResolve
} = require('customize-cra');
const MiniCssExtractPlugin = require('mini-css-extract-plugin');

//  支持stylus
const stylus = () => config => {
    const finialLoader = config.mode === 'development' ? 'style-loader' : MiniCssExtractPlugin.loader;
    const stylusLoader = {
        test: /\.styl$/,
        use: [
            {
                loader: finialLoader
            }, {
                loader: 'css-loader',
            }, {
                loader: 'stylus-loader',
            }
        ]
    };
    const {oneOf} = config.module.rules.find(rule => rule.oneOf);
    oneOf.unshift(stylusLoader);
    return config;
};

const rewiredMap = () => config => {
    config.devtool = config.mode === 'development' ? 'cheap-module-source-map' : false;
    return config;
};

module.exports = {
    // The Webpack config to use when compiling your react app for development or production.
    webpack: override(
        // 关闭mapSource
        rewiredMap(),
        disableEsLint(),
        fixBabelImports('import', {
            libraryName: 'antd',
            libraryDirectory: 'es',
            // style: 'css',
            style: true,
        }),
        addLessLoader({
            lessOptions: {
                javascriptEnabled: true,
                // modifyVars: { '@primary-color': '#1DA57A' },
            }
        }),
        stylus(),
        addWebpackResolve({
            alias: {
                '@resource': path.resolve(__dirname, 'src/resource'),
                '@common': path.resolve(__dirname, 'src/common'),
                '@module': path.resolve(__dirname, 'src/module'),
                '@icomoon': path.resolve(__dirname, 'src/icomoon'),
                '@service': path.resolve(__dirname, 'src/service'),
            }
        })
    ),
    // ……
};
从代码里可以看到关于 stylus 的处理被放在了 stylus 方法中,目前实现的功能是能够解析 .styl 后缀的样式文件。
而我所需要做的是让 *.styl 支持css module,所以只需要修改 stylus 方法就行。
实现 css module 的代码如下:
//  支持stylus
const stylus = () => config => {
    const finialLoader = config.mode === 'development' ? 'style-loader' : MiniCssExtractPlugin.loader;
    const stylusLoader = {
        test: /\.styl$/,
        // 剔除 .module.styl 文件
        exclude: /\.module.styl$/,
        use: [
            {
                loader: finialLoader
            }, {
                loader: 'css-loader',
            }, {
                loader: 'stylus-loader',
            }
        ]
    };
    const stylusModuleLoader = {
        // 仅对 .module.styl 文件进行处理
        test: /\.module.styl$/,
        use: [
            {
                loader: finialLoader
            }, {
                loader: 'css-loader',
                // !!!Important!!!
                options:{
                    modules: true,
                }
            }, {
                loader: 'stylus-loader',
            }
        ]
    };
    const {oneOf} = config.module.rules.find(rule => rule.oneOf);
    oneOf.unshift(stylusLoader, stylusModuleLoader);
    return config;
};
这样改完就实现了 css module 了。
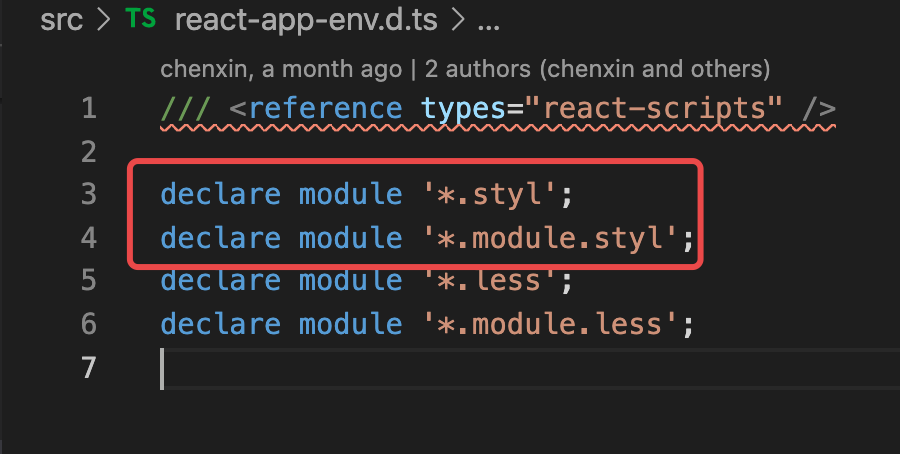
但是在我们在项目里面使用了Typescript,所以需要配置解析 .module.styl 后缀的文件。
使用验证
为了验证 css module 确实生效了,我得做一个测试。测试方式如下:
选择某个模块的 index.styl文件,将文件名改成 index.module.styl 。
-index.styl
+index.module.styl
接着改一下该模块引入样式文件的方式:
index.tsx
-import './index.styl';
+import styles from './index.module.styl';
这样改是因为我们使用css module的时候是会给元素的class属性赋值一个类名变量,而不是一个字符串,就像下面这样:
index.tsx
-import './index.styl';
+import styles from './index.module.styl';

-<div className="task-filter"></div>
+<div className={styles["task-filter"]}></div>
修改完之后重启项目,在浏览器控制台中可以看见该元素的类名变成了下面这样👇
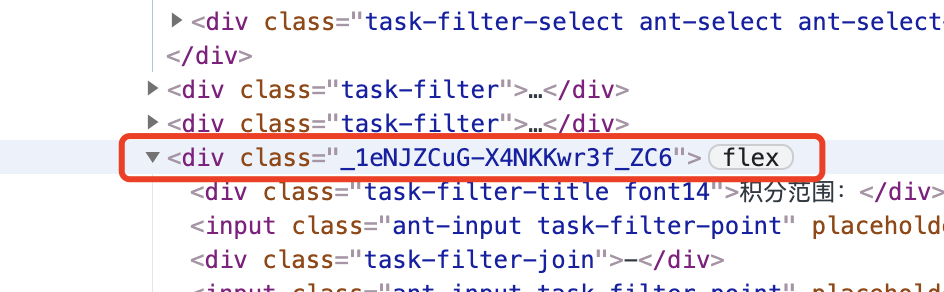
<div class="_1eNJZCuG-X4NKKwr3f_ZC6"></div>
这说明css module已经生效了。而我们常见的css module的类名并不是这种随机的字符串,而是一些特定名称的拼接组合。如果要实现这种拼接组合该怎么做呢?其实也很简单,只需要找到 stylus 方法里 stylusModuleLoader 对象里的 modules 属性值即可:
-modules: true
+modules: {
+    localIdentName: "[path][name]__[local]--[hash:5]"
+}
stylusModuleLoader 修改后代码如下:
// 自定义模块化名称
const stylusModuleLoader = {
    test: /\.module.styl$/,
    use: [
        {
            loader: finialLoader
        }, {
            loader: 'css-loader',
            options: {
                modules: {
                    localIdentName: "[path][name]__[local]--[hash:5]"
                },
            }
        }, {
            loader: 'stylus-loader',
        }
    ]
};
当我们完成了类名的自定义之后,可以在浏览器控制台中看到如下的类名展示:
<div class="src-module-TaskPoint-index-module__task-filter--86d9f"></div>
关于[path]、[name]、[local]、[hash]的含义参考参考链接[3]。
问题处理
当然我在完成这次改动的过程中,也遇到了一些问题。当我改完之后重启项目时,项目启动失败,vscode控制台打印如下的错误
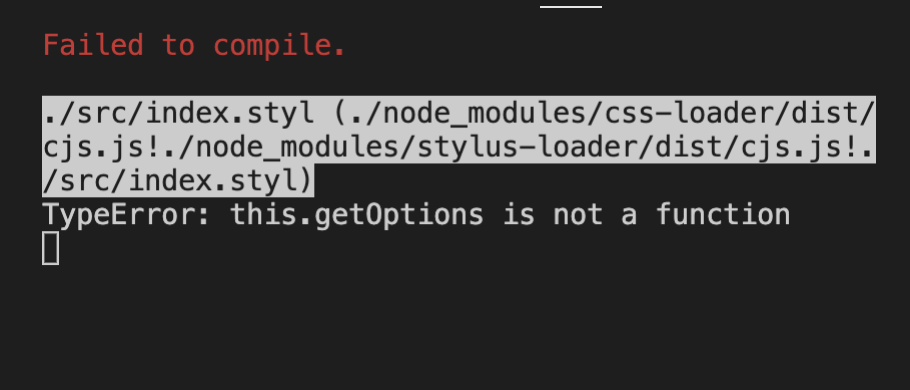
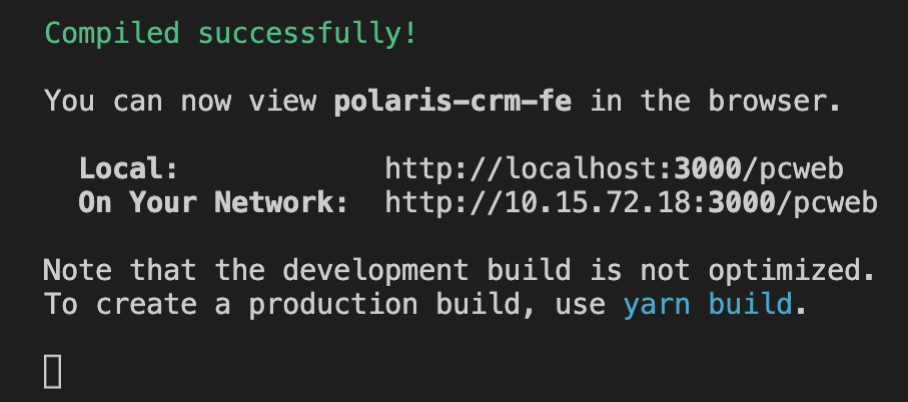
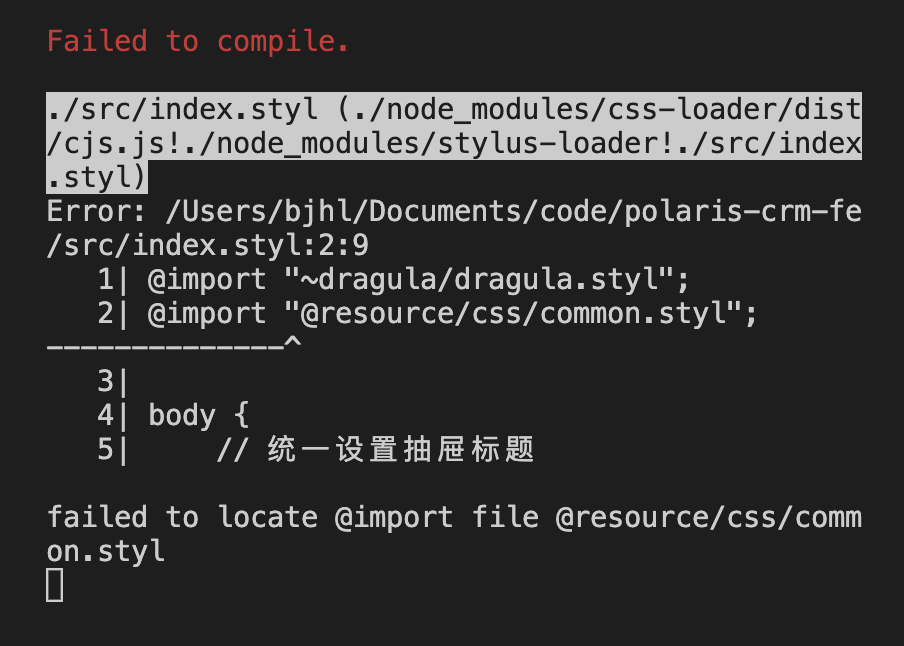
经过查找资料发现是 stylus-loader 版本太高了,不兼容 getOptions 方法,当前是 stylus-loader@^6.1.0。于是我看着网上方法调低了版本至 stylus-loader@^3.0.2,然后重启项目,项目又启动失败了,控制台报错如下:
而这个问题又是因为 stylus-loader 版本太低了,需要使用~来查找路径。所以我将版本调整至 stylus-loader@^4.2.0。此时重启项目,终于成功了!